July 30, 2026
How to Clean a Telescope Mirror Without Ruining It
Most advice on how to clean a telescope mirror gets the order backwards. People reach for soap because the surface looks dusty, then they scrub as if they're cleaning a kitchen pan. A telescope mirror is different, because the coating is thin, and every unnecessary cleaning cycle spends a little more of that coating's life.
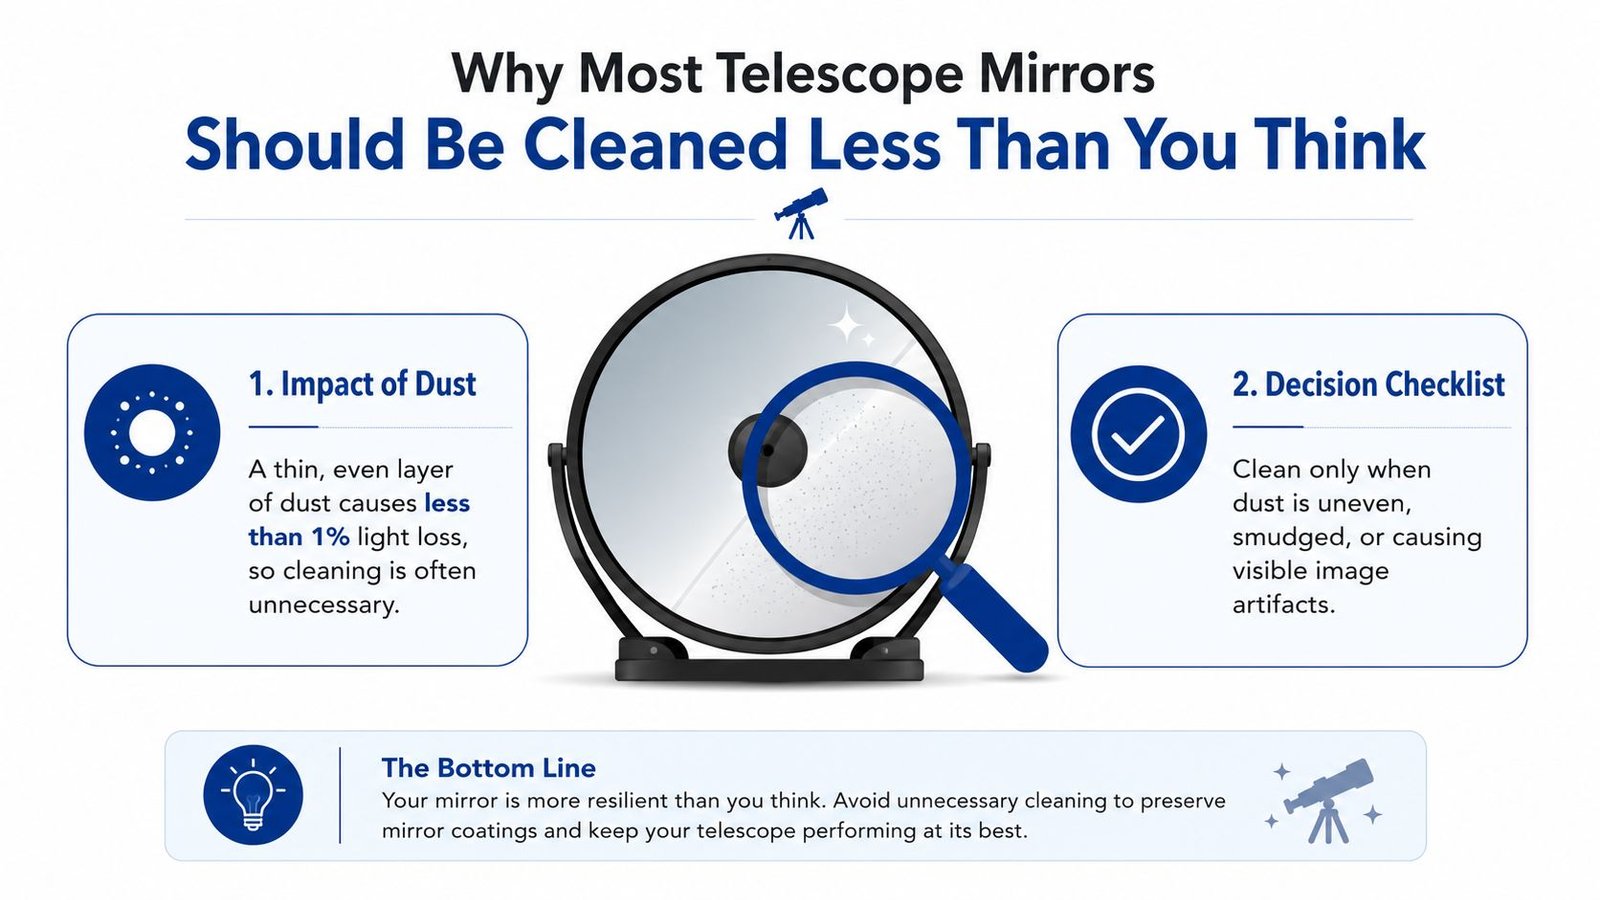
The better question isn't “How do I make it look perfect?” It's “Does this mirror need cleaning yet?” A thin, even layer of dust is usually a restraint problem, not a performance crisis. The right move is to treat cleaning like maintenance with judgment, not a reflex with water.
Table of Contents
- Why Most Telescope Mirrors Should Be Cleaned Less Than You Think
- Tools and Workspace Setup Before You Touch the Mirror
- Dry Cleaning With Air and Brush
- Wet Cleaning With Soap, Soak, and Distilled Rinse
- In-Situ Cleaning Versus Removing the Mirror
- Drying, Reassembly, Collimation, and the Star Test
- Cleaning Schedule, Red Flags, and When to Call a Pro
Why Most Telescope Mirrors Should Be Cleaned Less Than You Think
A lot of observers assume any visible dust means the mirror needs a bath. That instinct causes more harm than the dust itself. Telescope mirrors are meant to be observed through, not judged for appearance, and the coating usually tolerates a light film of dust better than repeated handling, wiping, or scrubbing. The better rule is to use the least aggressive method that gets the job done, because every extra pass across the surface adds risk without improving the image much. That is the standard view in practical optics care, and it favors gentle, low-pressure cleaning over chasing a mirror that looks perfect on the bench.
Read the surface, not your anxiety
The useful distinction is between loose dust and bonded contamination. Dust that looks even and dry usually waits. Smears, pollen residue, water spots, greasy fingerprints, or a haze that survives a dry puff are the signs that the mirror needs attention. Staged cleaning methods all follow the same order, loosen the contamination, lift it, then rinse it away without dragging anything across the coating (Telescope Boss).
Practical rule: if the mirror looks dusty but the view is still normal, leave it alone.
That restraint matters because mirror cleaning is not neutral. The coating does not improve from being handled, it just gets cleaned. A mirror that is clean enough for the sky can look unimpressive on the workbench, and that is fine. For a good stargazing telescope, the goal is usable contrast at the eyepiece, not a spotless reflection under a lamp.
A simple decision rubric helps:
- Wait if the dust is light, even, and dry.
- Act if the contamination is patchy, sticky, oily, or leaves visible image artifacts.
- Escalate if the coating itself looks damaged, cloudy, or pinholed.
That judgment becomes easier if you ask one practical question first, does the mirror still support the view you want? If the answer is yes, cleaning can wait. If the answer is no, choose the mildest method that addresses the problem and protect the coating from unnecessary wear.
When the surface is only dusty, patience saves more coating than cleaning does. When the contamination is real, use a careful wash and stop before the urge to make it look brand new takes over.
Tools and Workspace Setup Before You Touch the Mirror
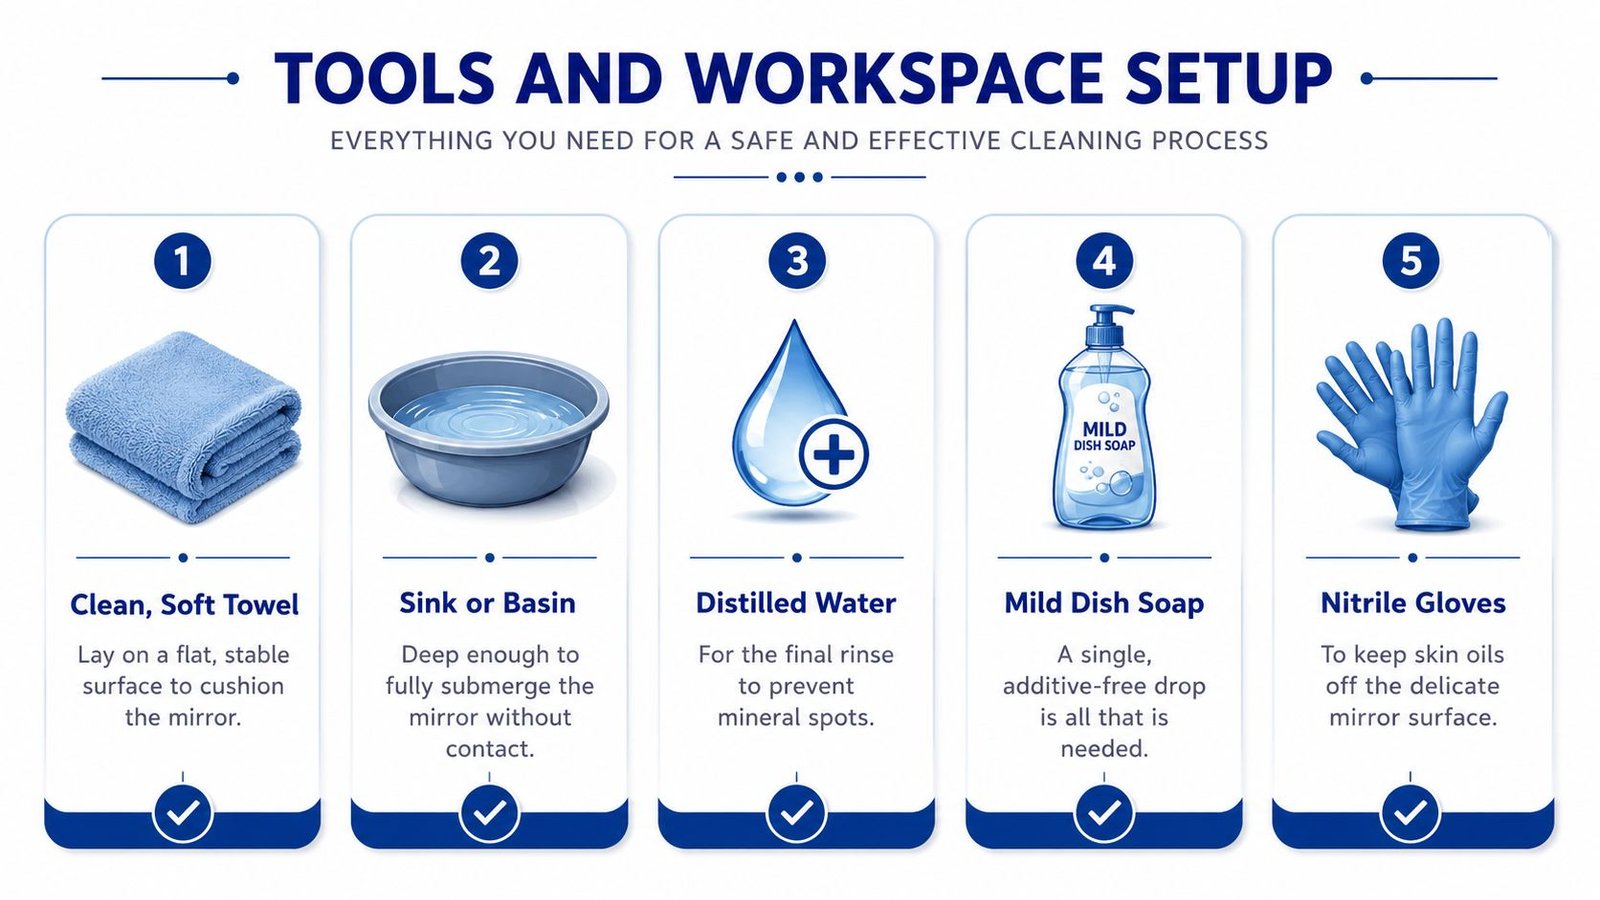
Start with the room, not the mirror. Set a clean, flat towel on a stable surface so the optic has a soft landing, and use a sink or basin that is deep enough to hold the mirror without letting it rub against a hard edge. The small toolkit stays the same across good cleaning guides, cotton balls or cotton batting, distilled water, mild dish soap, and a bulb air blower for loose dust (Agena Astro, Obsession Telescopes).
Build the setup around the mirror, not around convenience
Use room-temperature water or lukewarm water, not hot water. Mild detergent belongs in tiny amounts, just a few drops or a very small dose in the wash water, followed by a distilled-water final rinse so minerals do not dry into spots. That approach is the practical compromise, enough cleaning power to lift residue, but not so much chemistry that you start chasing new problems across the coating (Sky & Telescope, Agena Astro).
Keep the wrong materials out of reach before the mirror comes out:
- Paper towels can drag grit across the coating.
- Microfibre shop cloths can hold contamination and still feel soft.
- Aggressive detergents and abrasive cleaners belong nowhere near optical coatings.
- Solvents like gasoline, mineral spirits, and turpentine are specifically warned against in one detailed mirror-care reference (ASNSW).
Buy enough distilled water to finish the job cleanly. Several cleaning procedures rely on a generous final rinse, because the goal is to flush away soap and mineral residue rather than move drips around the surface. If you are setting up for a big observing weekend or planning around travel for solar eclipse viewing in Europe later in 2026, the same calm setup habits help keep a telescope you can see Saturn with ready for the night, without forcing a rush that can damage the coating (Roger Ivester, telescope you can see Saturn with).
A few habits prevent mistakes before they start. Remove rings and watches, keep pets out of the room, and do not rush the disassembly. The mirror cleans best when the workspace is controlled, the supplies are ready, and you have already decided whether the contamination is light enough to leave alone, stubborn enough to wash, or bad enough to justify recoating.
Dry Cleaning With Air and Brush
Dry cleaning is the first pass, not the whole job. A rubber bulb air blower is the safest starting tool because it moves loose dust without touching the coating. Canned air is a different thing, and it's not the same as a hand bulb, so the safer default is the hand blower.
Push debris off the surface, don't push it into it
Hold the mirror at an angle or face-down so dust falls away instead of resettling. Use several short bursts, not one long blast, and stop as soon as the surface stops shedding visible loose dust. That's the point where dry cleaning has done its job.
A soft-bristle brush or lens brush can help if the contamination is still loose after the blower. Keep the pressure feather-light, and treat the brush like a way to nudge particles off the coating, not sweep the surface like a countertop. The consistent theme across mirror-care references is the same, gentle removal beats force every time (ASNSW).
If the dry pass keeps producing dust, keep going gently. If it stops making visible progress, stop there.
The useful judgment call is knowing when to quit. If you see a mirror that looks cleaner after air and brush work, and the remaining marks are just a faint, even film, you may not need wet cleaning at all. That saves the coating from unnecessary handling, which is the primary advantage here.
If the residue stays put, feels sticky, or looks like a spot rather than dust, move to the wet routine. Don't keep brushing harder. Harder is how coatings get scratched.
Wet Cleaning With Soap, Soak, and Distilled Rinse
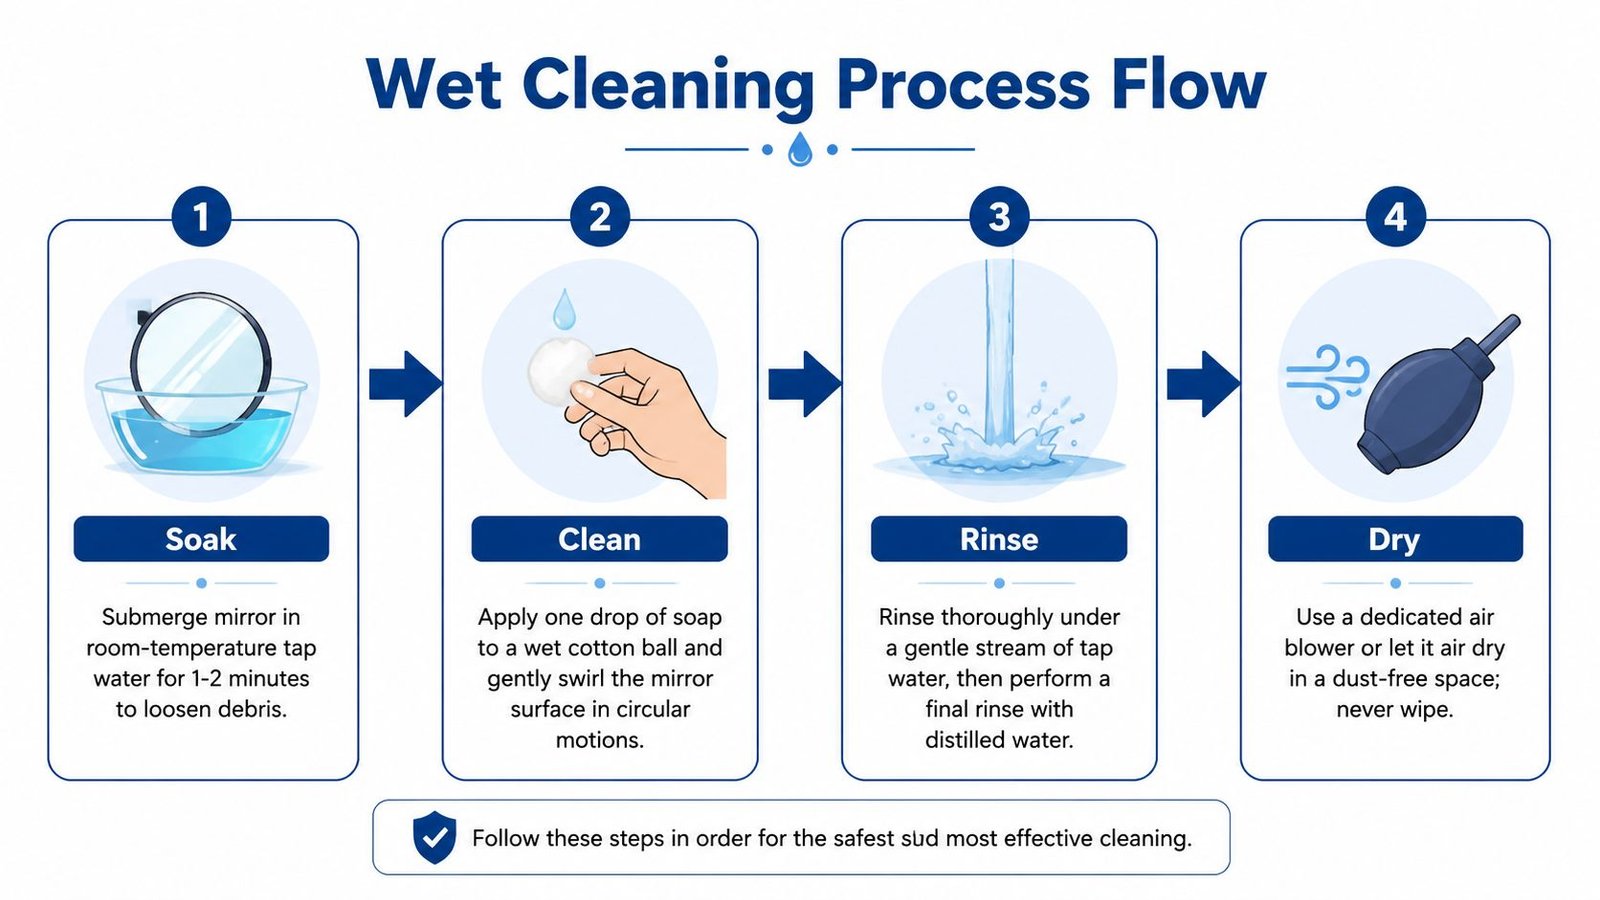
Wet cleaning makes sense after dry cleaning has done all it can and the contamination still stays put. The job is not to scrub the glass into looking perfect, it is to decide whether the mirror needs a gentle wash, a longer wait, or a recoating later if the coating is already failing. The safest approach follows a simple order, loosen first, lift gently, rinse thoroughly, dry without rubbing.
Use the soak to loosen, not to soak forever
Start with room-temperature or lukewarm water. Use only a tiny amount of non-abrasive dish soap in distilled water, just enough to break the surface tension and let residue release. Keep the mix mild. Heavy soap leaves more work for the rinse and gives you nothing in return.
Let the mirror sit long enough for grime to soften, then move on while the contamination is still floating. The point of the soak is to loosen bonded material, not to leave the coating sitting in water for no reason. If you are dealing with a mirror that only has a faint film, a short soak may be enough. If the residue is stubborn, patience helps more than pressure.
Use cotton balls or cotton batting for the actual cleaning passes. Work with a fresh piece each time, and let it glide with only the light weight of the wet cotton on the surface. One pass should pick up debris, not chase it around. If a cotton ball looks dirty, discard it and take a new one. Reusing it is how grit gets dragged back across the coating.
Rinse like you mean it
After the soap passes, rinse until the water running off the mirror is no longer carrying loosened residue. A thorough rinse matters because any leftover soap film can dry into streaks or spots. Finish with distilled water so you are not leaving mineral deposits behind. That final rinse is the part that saves you from cleaning the mirror twice.
Do not scrub. Let the water do the moving, and let the cotton only lift what has already softened.
Dry the mirror on its edge so the water drains instead of pooling into rings. Flat drying invites spots, especially if the room air is not clean or the mirror sits still too long. I prefer vertical drying for that reason, because it gives the rinse water one clear path off the surface and keeps me from chasing blotches later.
In-Situ Cleaning Versus Removing the Mirror
Not every mirror has to come out of the telescope. A quick in-situ clean can make sense when the contamination is light and the hardware gives you safe access, especially on a Newtonian secondary, a small Maksutov-Cassegrain corrector plate, or any optic where the surface can be reached without risking a bigger teardown. A first pass in place also tells you whether the contamination is minor enough to leave alone.
Use removal only when the surface really needs it
Full removal becomes the better option when the residue is oily, the grime is bonded, or the mirror shows signs of aging coating failure. The care literature points out a real gap here, common how-to pages describe washing and drying, but they often under-address when a coating is already failing and when recoating is the smarter path (Loptics mirror care). That's a judgment problem, not a cleaning problem.
If you do remove a Newtonian primary, mark the mirror cell so it goes back the same way. Avoid rotating parts casually, because reassembly mistakes turn a simple cleaning into a collimation chase. A careful owner handles the mirror like an optical component, not a loose part.
The best time to clean a removed mirror is when the rest of the telescope is already organized for reassembly.
The main trade-off is obvious. In-situ cleaning reduces disassembly risk, but removal gives you better access and better control over rinsing and drying. If the contamination sits on an edge, or if you can already see coating damage, removal is usually the safer long-term call. If the mirror is only lightly dusty, leave it in place and save yourself the alignment work.
Drying, Reassembly, Collimation, and the Star Test
A cleaned mirror is only ready after it is dry, reinstalled, and checked on sky. Set it on its edge until every trace of moisture is gone, then put it back in the cell with even pressure from the clips so the glass sits free and is not pinched. Pinching is easy to miss, and it can mimic an optical fault even when the cleaning itself went well.
Put the tube back together with alignment in mind
When the mirror goes back in, treat collimation as part of the cleaning job, not an optional extra. Reassemble the tube, then collimate from scratch with the tool you already trust, whether that is a sight tube or a laser. Small shifts during removal and reinstalling are enough to make a “close enough” return look off at the eyepiece, especially if the scope will be used with auto tracking telescopes or other setups that depend on a steady optical axis. The goal is to restore alignment, not just fasten the parts back in place.
Drying deserves patience here. If the mirror goes back in while there is still moisture at the edge or behind the cell, you can trap residue and create spots that look like cleaning damage later. I prefer to leave the mirror alone until it is fully dry rather than hurry the rebuild and pay for it with another teardown.
The fastest reality check is a star test. Defocus a moderately bright star and examine the diffraction rings. A centered pattern means the axis is behaving. A lopsided pattern points to reassembly error, pinched optics, or a deeper issue that cleaning did not cause and cannot fix.
Judge the coating honestly
Cleaning also shows the coating as it really is. If you see pinholes, oxidation blooms, or hazy patches, the mirror may be past the point where more cleaning will help. At that stage, recoating is the better call because the problem is worn aluminum, not loose dirt.
If the star test looks steady and the coating still reflects evenly, the telescope is ready to use again. If the image still seems wrong after careful collimation, stop blaming the cleaning and look for a larger optical problem.
Cleaning Schedule, Red Flags, and When to Call a Pro
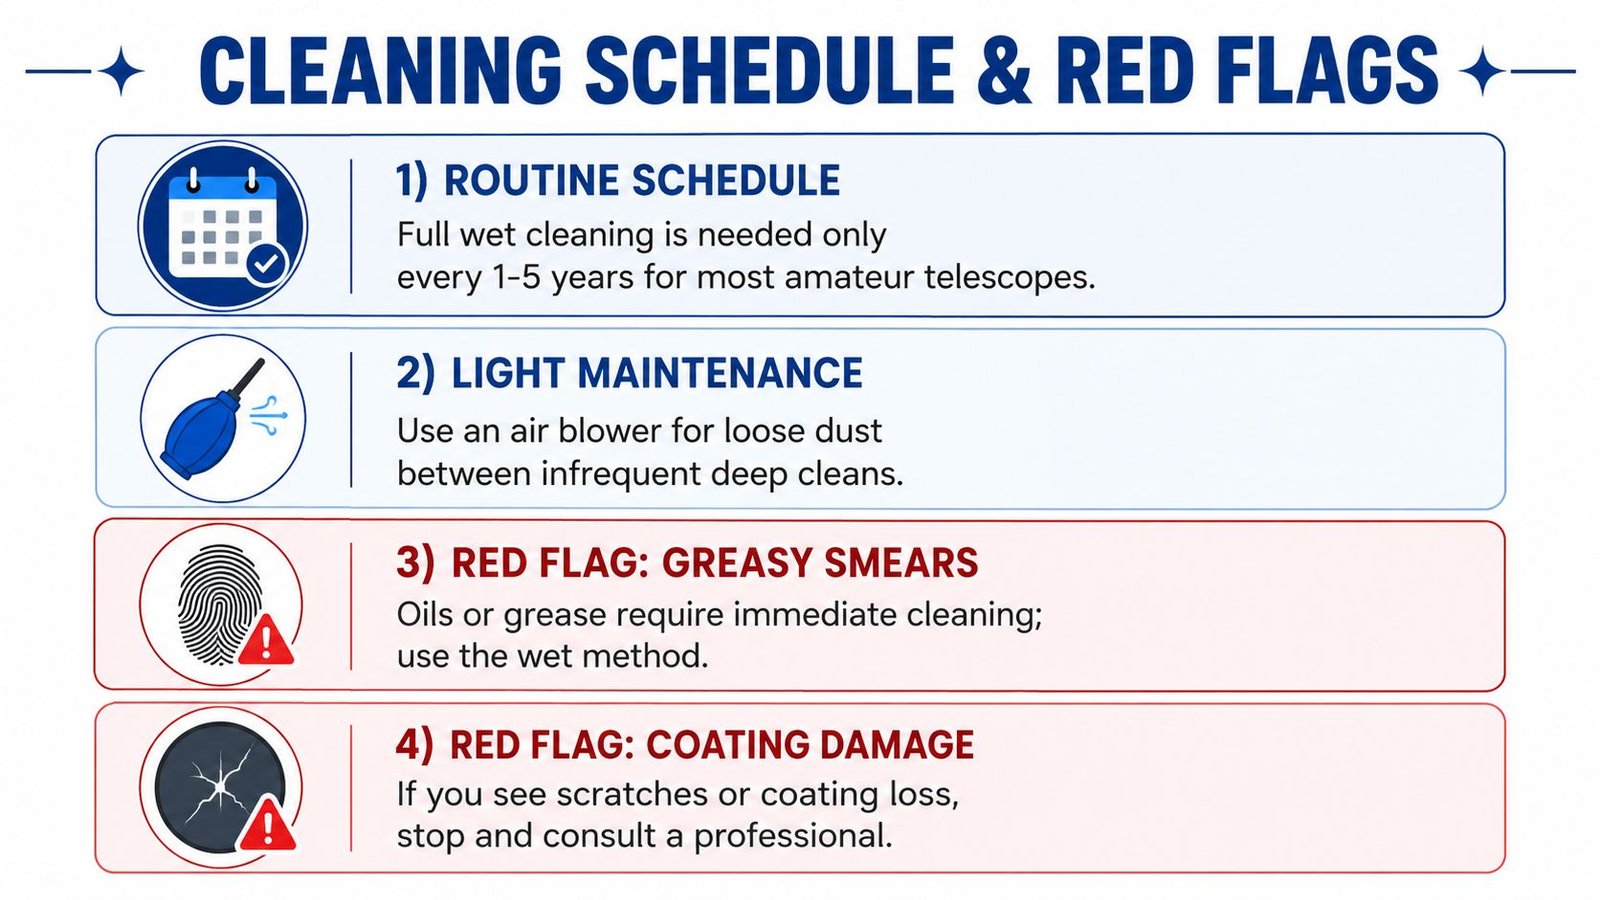
Most amateur telescopes don't need frequent full wet cleaning. Light dust belongs to the air blower, and real washing is something you reserve for visible contamination, not a calendar reflex. A disciplined schedule protects the coating far better than a spotless-looking mirror ever could.
Know when to stop and hand it off
A reasonable rhythm is simple:
- Routine schedule: use a full wet cleaning only when the mirror has real contamination, not just dust.
- Light maintenance: use a blower between deep cleans.
- Red flag, greasy smears: clean immediately with the wet method.
- Red flag, coating damage: stop and get professional help.
The one thing not to do is treat every spot as if it needs force. Aggressive scrubbing, unknown coatings, and visible flaking aluminum are all stop signs. If the mirror already has scratches from a previous attempt, another DIY round usually adds risk instead of value.
Professional recoating makes more sense when the coating is heavily degraded, especially on a valuable or large-aperture optic. If the surface is beyond simple contamination, cleaning won't resurrect it. It's better to preserve the glass and restore the reflective layer properly than to keep washing a failing surface.
The calm truth is that a clean-but-not-pristine mirror still delivers the views you bought the telescope for. Restraint is the underrated cleaning tool, and it saves more coatings than any bottle of soap ever will.
If you're planning observations for the 2026 eclipse season, Total Solar Eclipse 2026 Live gives you the timing, path, and planning context that pairs well with a properly maintained telescope. Visit Total Solar Eclipse 2026 Live to check the Europe-focused eclipse tools, then make sure your optics are clean, aligned, and ready for the day that matters most.